WooCommerce modules overview:
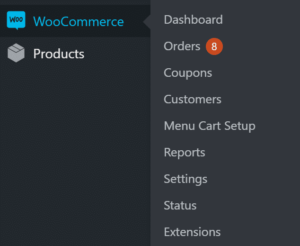
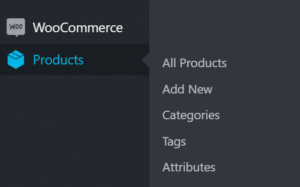
 Immediately when you log into your WordPress dashboard, you will notice two new options available in the sidebar titled “WooCommerce” and “Products”.
The WooCommerce module is where you will be able to configure the management related settings for your shop. This includes setting up payment methods, adding shipping options, tracking orders and performing other operations relating to your online store.
The products module is where all your products are created, managed and categorised. If you need to do anything related to products, this is where those activities take place.
WooCommerce Store Management & Settings:
By hovering over “WooCommerce” in the sidebar and clicking on “Settings” from the fly-out menu, you will be taken to a new page which contains most of the basic WooCommerce settings which need to be configured for operation of your online store.
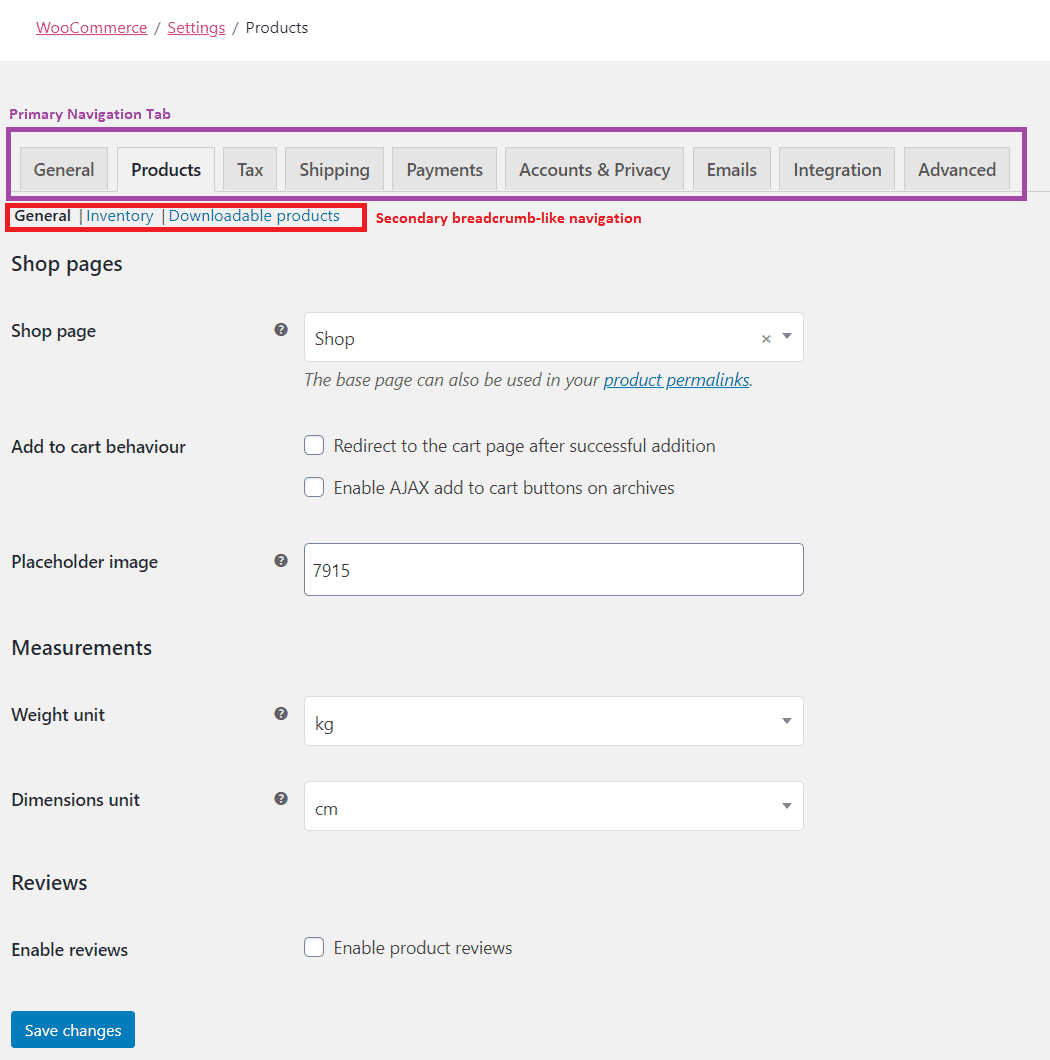
You can navigate through most of the settings by using the tabs towards the top of the page. It should also be noted that many tabs also contain additional sub-option pages you can navigate to by using the breadcrumb-like menu which may appear below the tabs.
We will have already configured all these options for you, but we’ll take you through the most adjustable settings and answer some common questions.
How does GST work?
A typical WooCommerce store will be configured to account for GST for all product and postage costs you enter. This means whenever you create a new product or add a shipping method, the price you enter must be inclusive of GST.
How are shipping methods & pricing configured?
Shipping options in WooCommerce are firstly categorised by “Shipping Zones” which you create.
By creating a shipping zone, you are grouping regions together which will provide customers within those regions with the same shipping options and pricing.
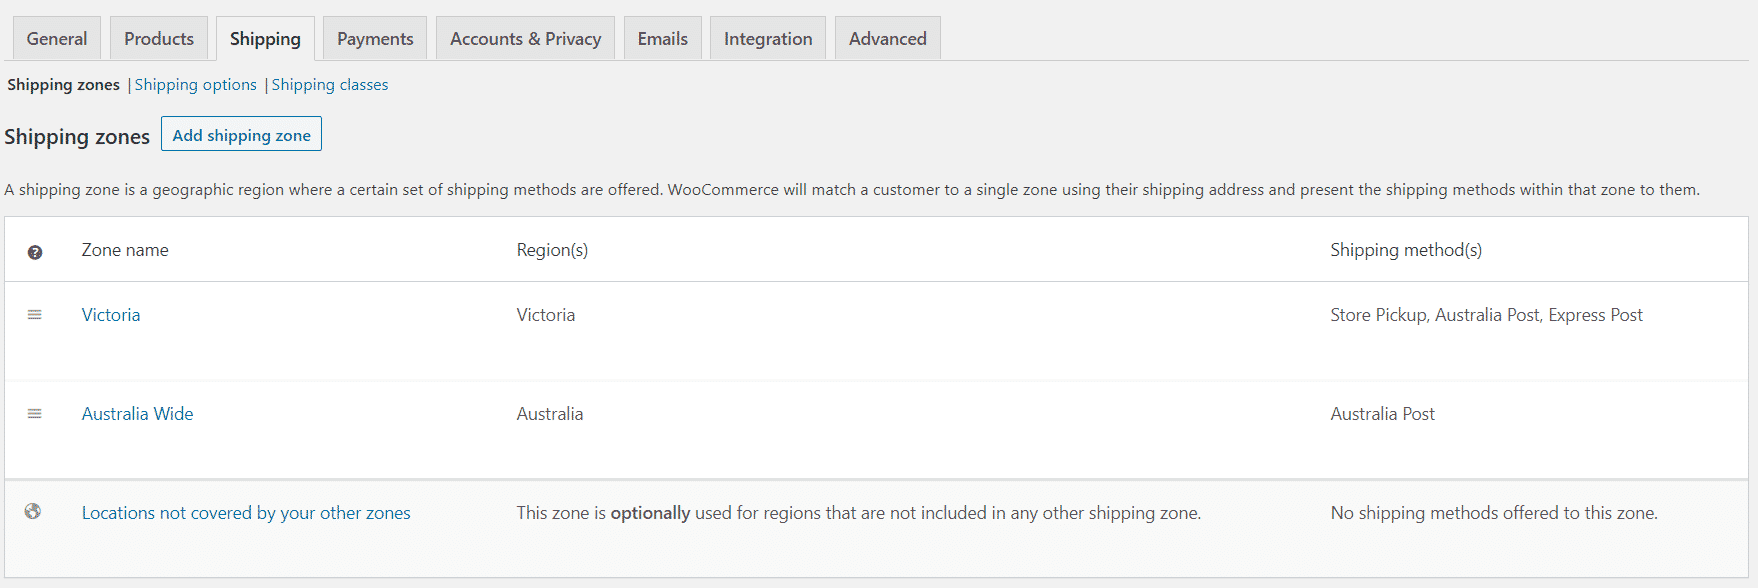
For example: You may have one shipping zone called Victoria which offers Pickup, Australia Post and Express Post to customers in the “Victoria” region. You may then have a second zone called “Australia Wide” which offers only Australia Post to anyone in Australia.
Configuring Shipping Zones & Methods
To create a new shipping method, you will need edit an existing shipping zone or create a new one. Within this zone configuration page, you will be required to provide a zone name (internal use only) and specify regions for which the zone rules will apply to.
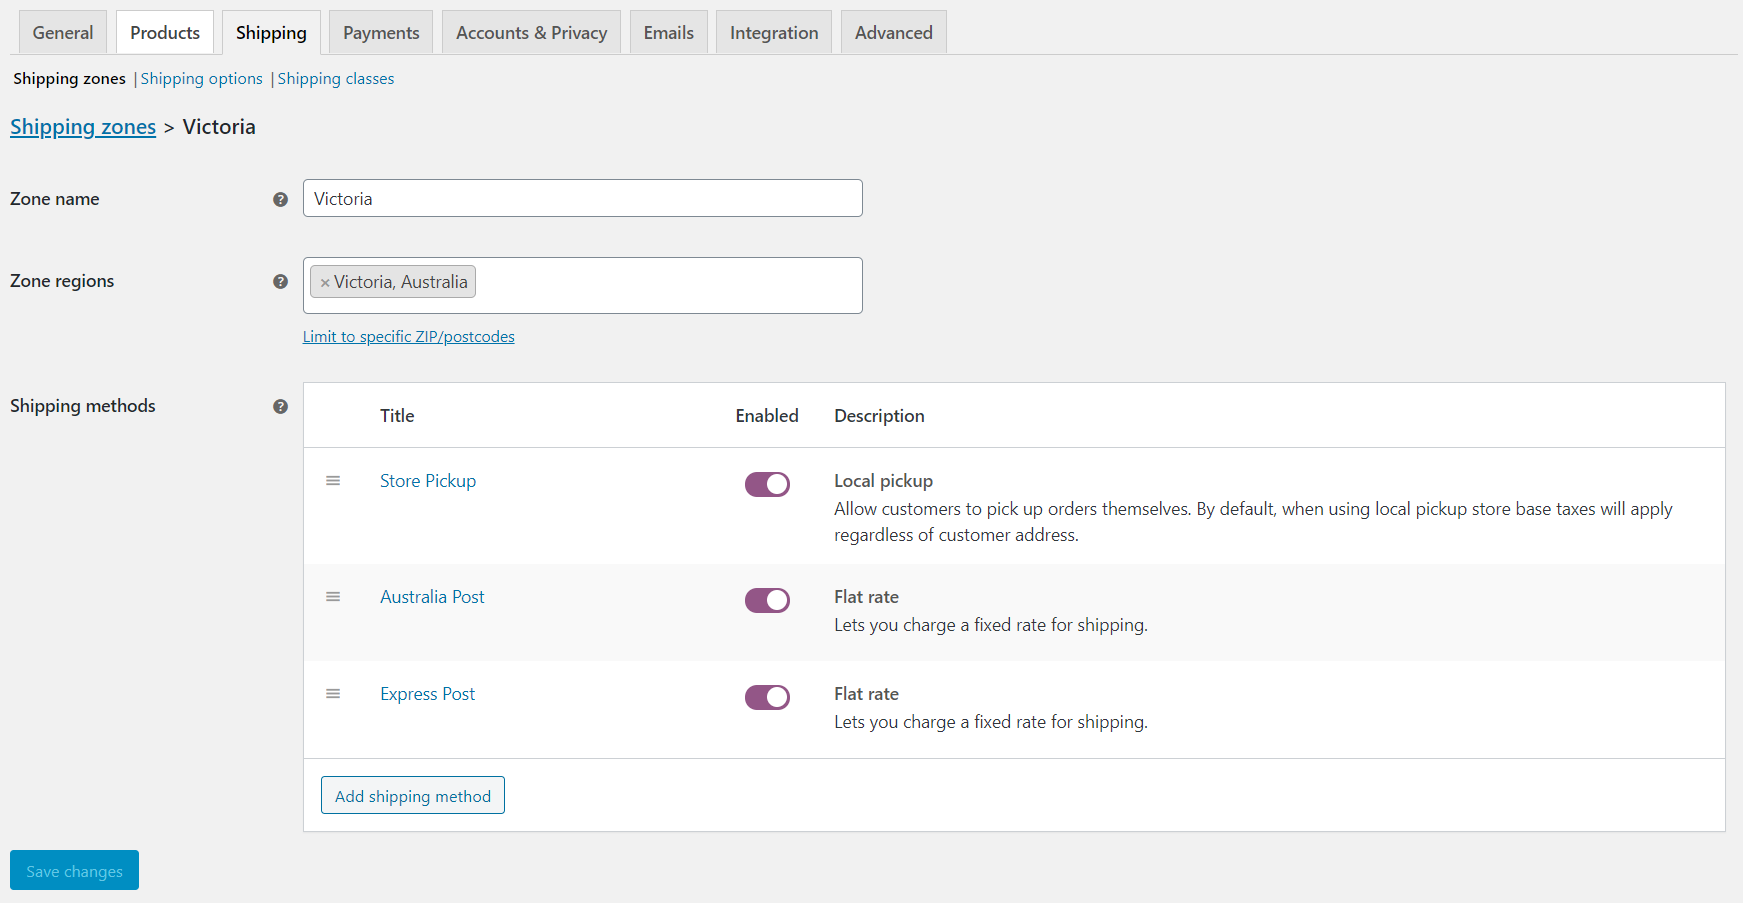
You are then able to add as many of the following types of shipping methods:
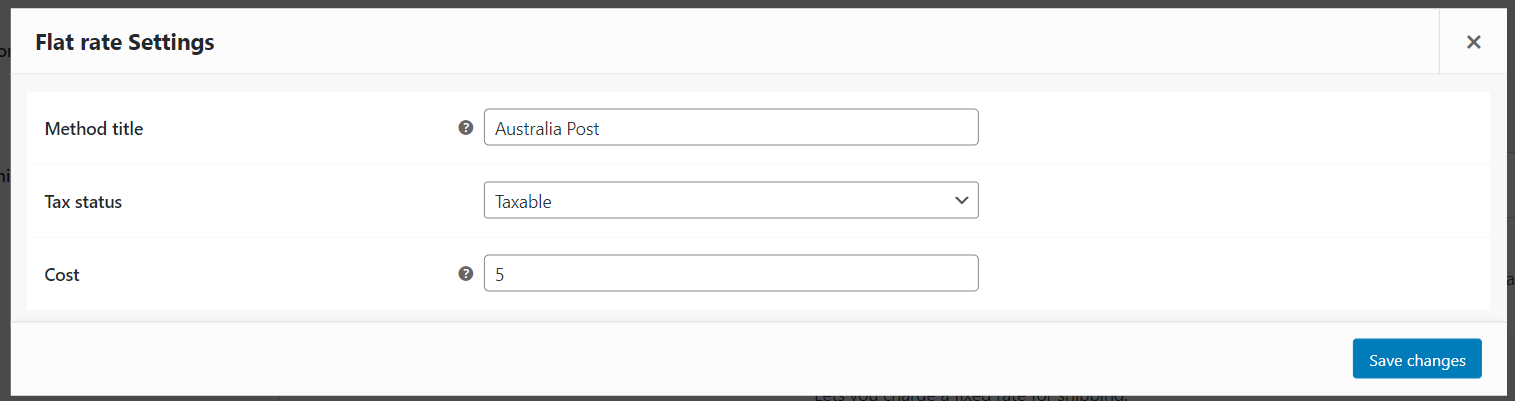
- Flat Rate: Which allows you to set a fixed price for shipping.
- Free Shipping: Which allows customers to select a free shipping option.
- Local Pickup: For customers to pickup at a physical store.
Once you choose the shipping method, be sure to create an appropriate title & set the cost as this is what the customer will see when selecting the shipping option.
Payment Options:
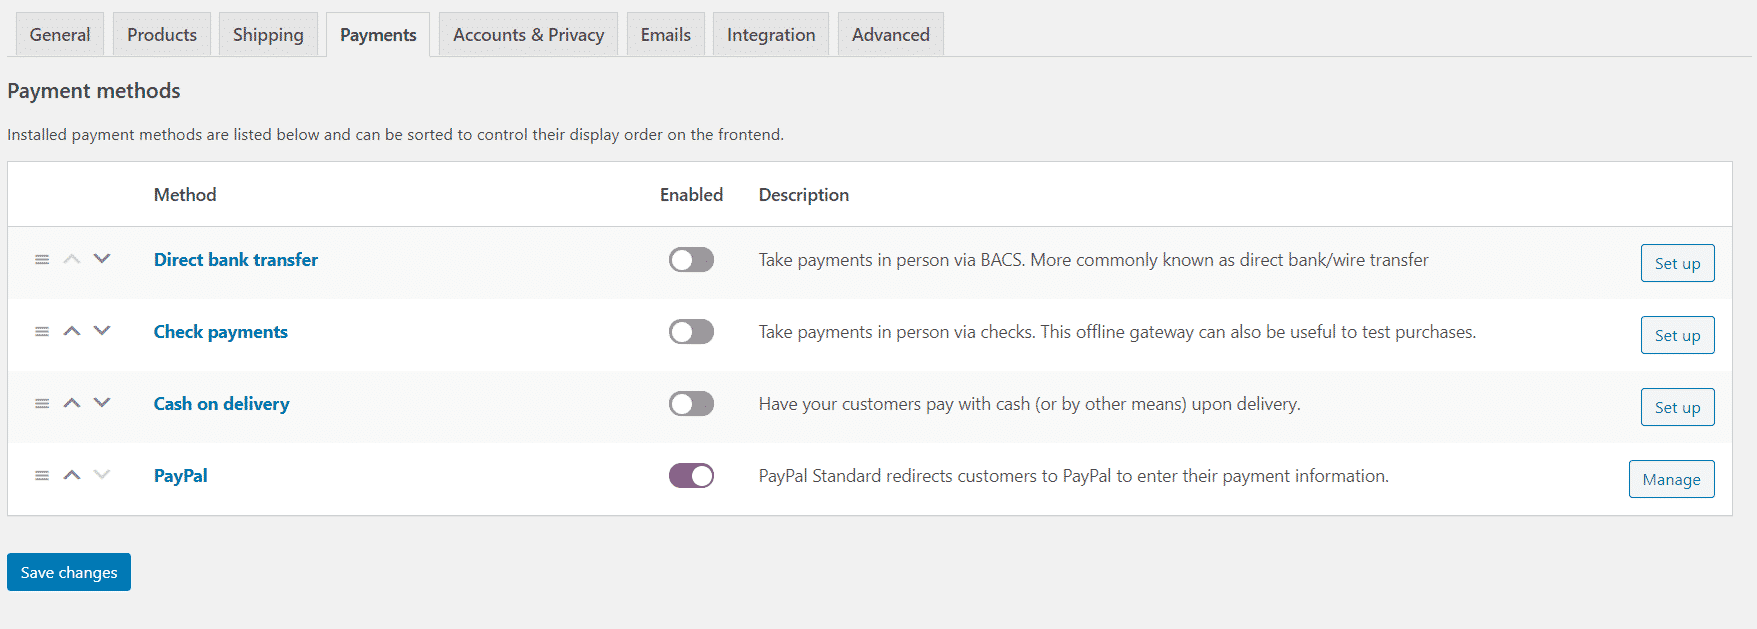
The payments screen will display all the available payment methods which you can configure and choose to accept in your WooCommerce store. We have already configured all of your preferred payment options, however if you would like to accept additional methods of payment you can set them up here by following the unique instructions WooCommerce provides under each payment method and ensuring the payment method is enabled.
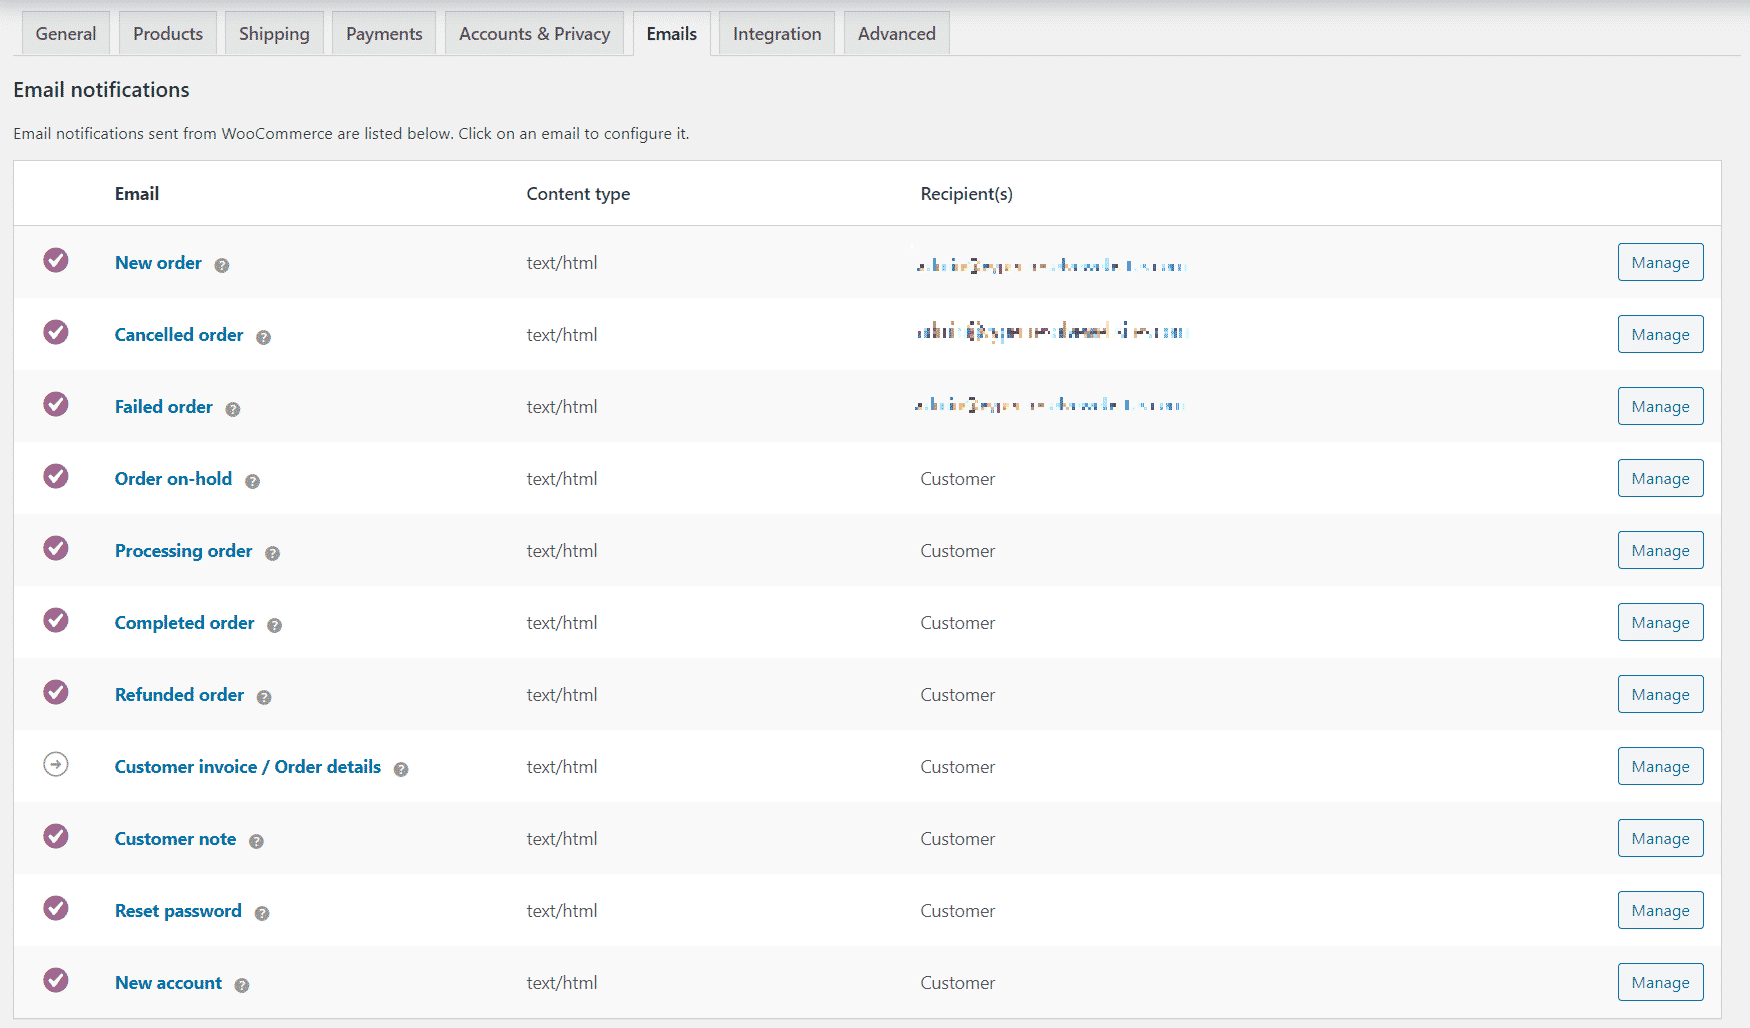
Email Templates:
By default, WooCommerce provides very minimal customisation options for the emails which are sent to customers.
As standard a customer will automatically receive an email notification for all events which have a purple tick and “customer” listed as the recipient. As the store manager, you will automatically receive emails for the events which have you listed as a recipient.
Please note: “Customer Invoice / Order details” is not automatically sent to customers as this contains the same information as the initial “Processing Order” email which is sent as soon as the customer makes a purchase.
As WooCommerce provides very few customisation options for emails, we recommend installing one of the following plugins if email customisation is important to you:
Adding & Modifying Products
 For product management and creation, you will need to navigate to the “Products” module in your WordPress dashboard. Here you will instantly find a list of your currently listed products and their status (In stock or Out of stock)
Creating a new product:
When creating a new product, you will notice a familiar interface to the default WordPress page builder. To set the name of the product, you fill in the field towards the top of the page where you might normally write your post titles.
The large box where you might normally enter your post content is where you set the product description.
Setting a product image will likely be similar to how you set a featured image for a blog post. Located on the right-hand side of the page (below the “publish” button) there is a box titled “Product Image”. By clicking the link inside this box, you will be able to select an image to use for your product from your media gallery. If you would like to have multiple images per product, then you can add additional images by using the “image gallery” box which will be located further below.
To include a product within a specific category you will need to select a category (or create a new one) from the product categories box which is located on the right-hand side of the page. If you create a new category then WooCommerce will automatically display this category in your store.

Simple & Variable Products
There are two common types of products which you can create using WooCommerce.
- Simple Product
This is the most basic and likely most common type of product you will list on your store. You will be creating a simple product when your product does not offer any form of customisation, sizing or other forms of variation. This is for products which are sold exactly as described.
- Variable Products
These are types of products where there may be slight variations or customisations options available, but you only want them to be displayed as a single product on your store.
Some common examples of variable products include:
- Clothing which could be offered in different sizes and/or colours.
- Equipment which could be sold at different lengths or weights.
- Consumables which may be sold in different quantities such as 6 pack or 12 pack.
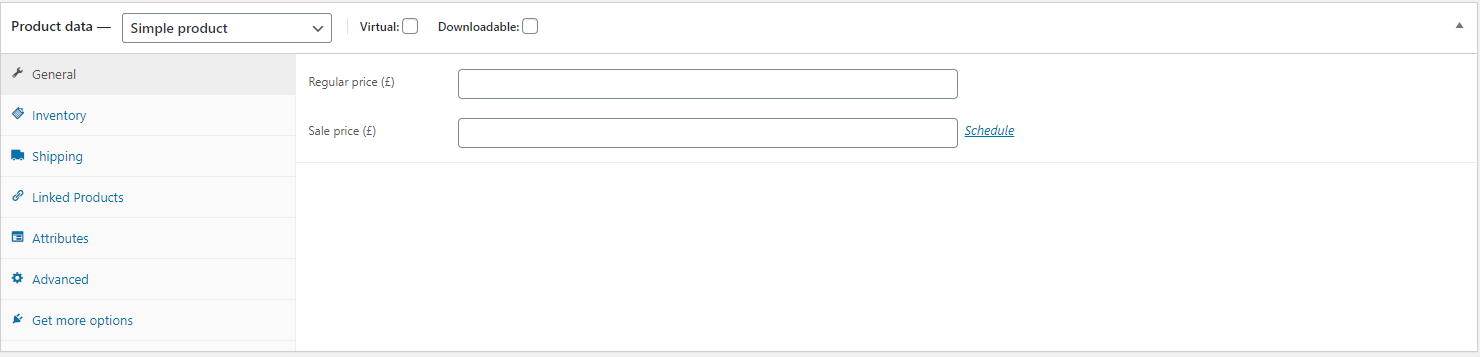
Creating a simple product:
Below the description field on the product page will be a new section for “Product Data”.
At the very top, ensure the dropdown menu has “Simple Product” selected.
In the General tab, you will be able to set your “Regular price” for your product. If you decide to have a sale on a specific product then you can also choose to add a “Sale price” and schedule the sale duration.
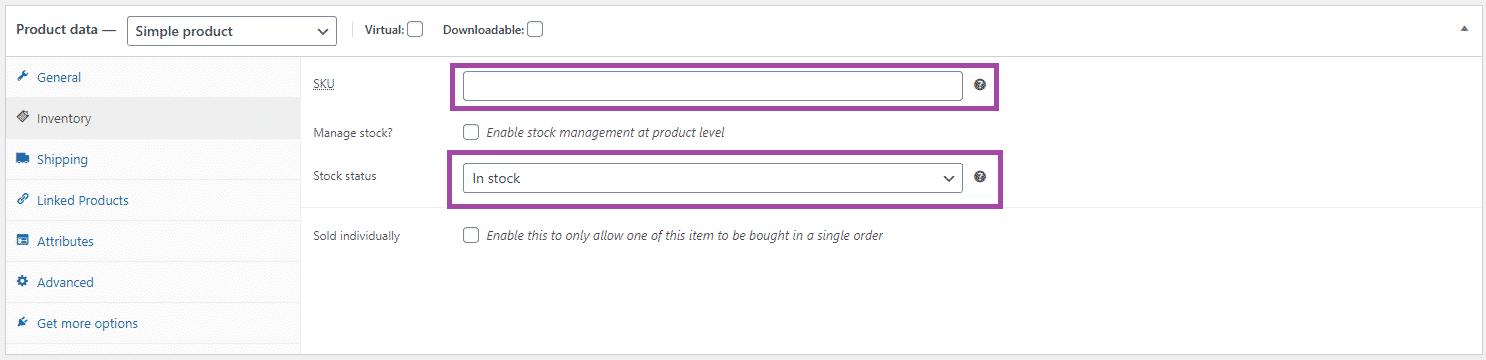
Inventory Tab
This allows you to set a product SKU which can be beneficial when tracking inventory or integrating with other platforms such as Google Shopping.
For most users, we recommend unticking the “Manage stock” option and manually adjusting this status if you run out of stock.
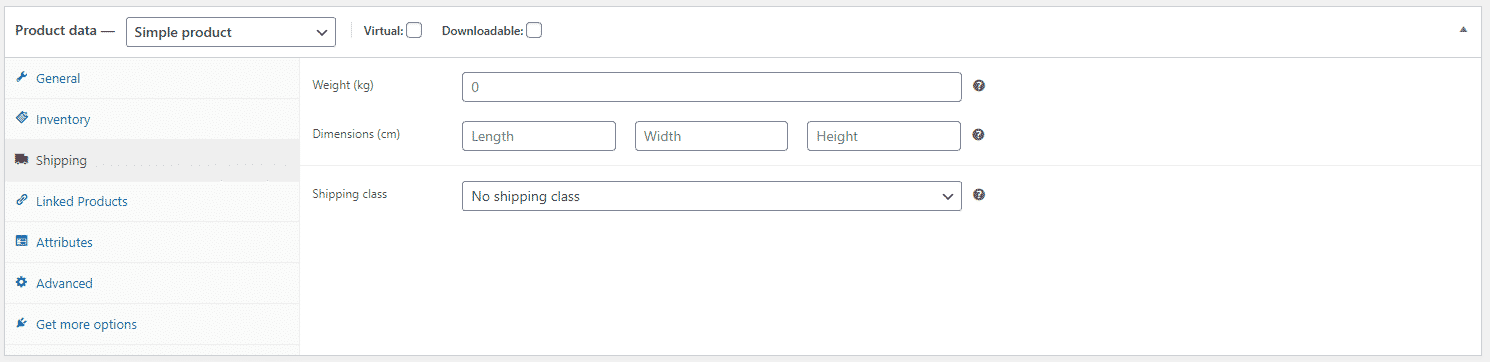
Shipping Tab
If you have setup custom shipping classes in your WooCommerce store then you will be able to assign your product a shipping class. The shipping tab also gives you the option to set the weight and dimensions for each product. Typically this information is not displayed on the product page out of the box, however your store may be configured to do so.
Creating a variable product
Creating a variable product requires that you have completed the steps above for creating a simple product and have also selected “Variable Product” in the “Product data” dropdown.
Additionally, before we can create product variations, product attributes must be created by navigating to the “Attributes” tab.
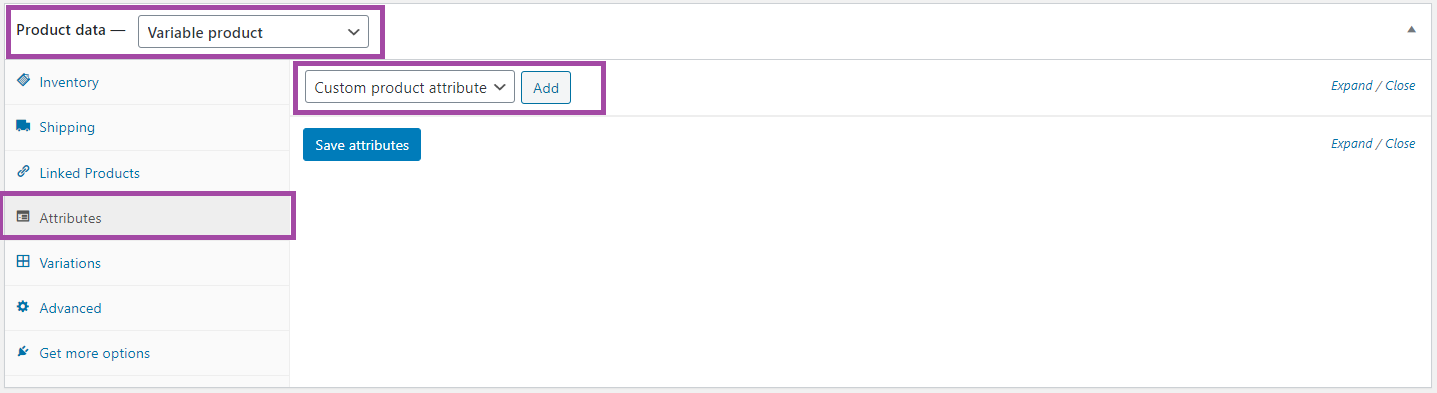
The attributes tab is where you define any attributes your product has which will be used for variations. For example, if your product is available in different sizes, you will need to configure a “Size” attribute. To do this, click the “Add” button next to the “Custom product attribute” drop down.
This will display additional fields for you to fill out about the products attributes. Be sure to give your attribute an appropriate name and values as this is how your customers will select variations of your product.
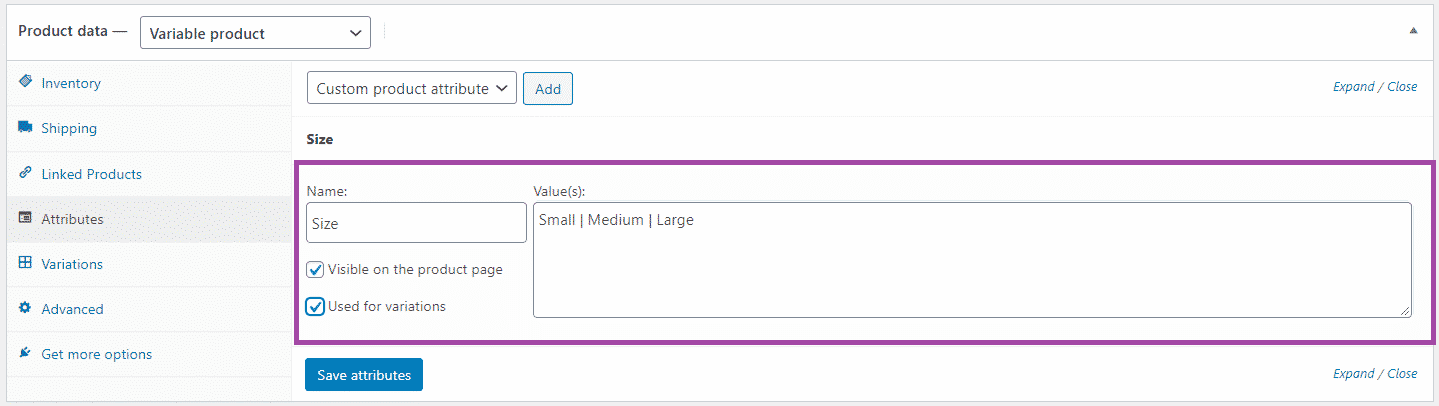
Once you have saved your attributes and have ticked “use for product variations” you can now begin creating your product variations.
By navigating to the “Variations” tab on the left, click the drop down and select the option “Create variations from all attributes” then press “Go” and confirm the dialogue.
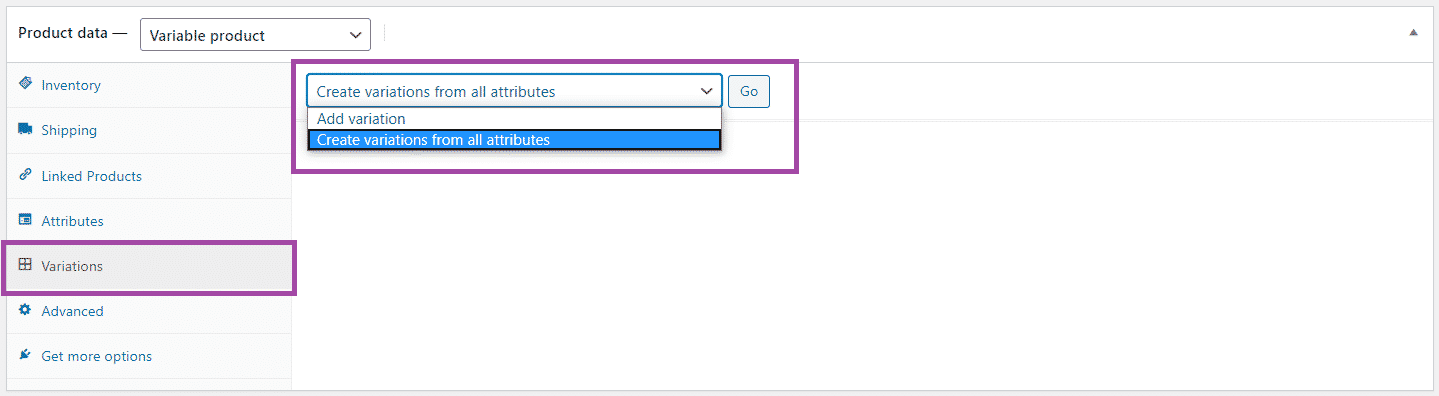
This will cause WooCommerce to automatically create all possible product variations based on the attribute values you provided.
Once this has completed, you will be able to expand fields for each of your product variations and provide unique data which is dynamically updated to the customer as they select different variations such as price, image, stock status and description. If you leave any fields blank, it will use the data from the primary product.